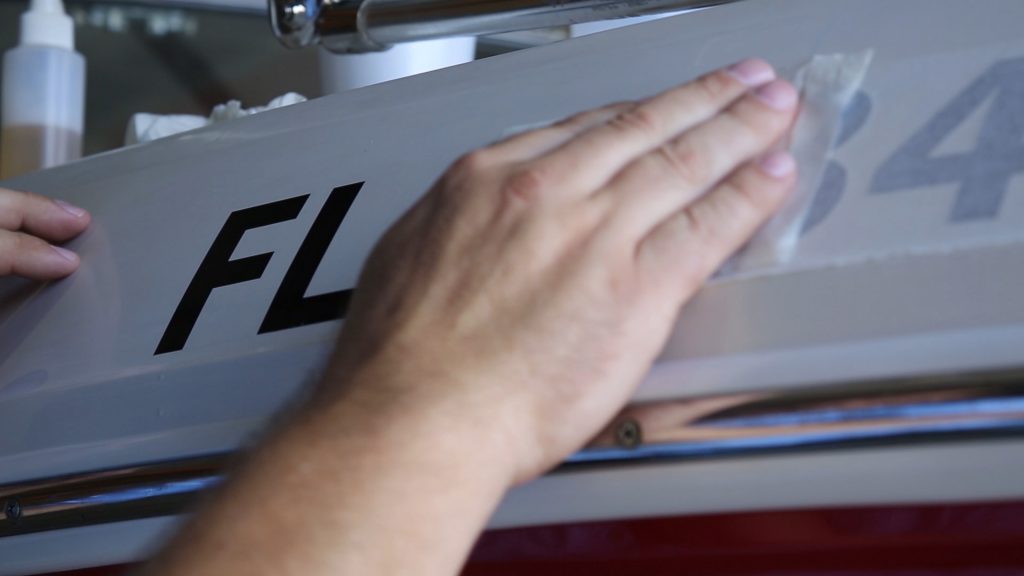
No matter if you’re applying Registration Letters or your Port of Hail, Vinyl Letters are applied in one of two ways- and we can show you how. The great news is, it’s simple! So grab your squeegee, application fluid and measuring tape and let’s get started applying your Vinyl Letters on boats.
Measure Twice
The old saying holds true here, measure twice- cut once. Except in this case it’s measure twice- order once. You’ll want to review state laws for your marine vessel and ensure you’re following the law in regards to sizing and placement of Registration Numbers or Port of Hail. Typically if you’re just applying vinyl letters for aesthetic reasons you shouldn’t have to worry about state law. Once you’ve measured your area you’d like to apply your letters to, go ahead and design your letters using a handy design tool. When you’ve received your order you’ll probably want to eyeball your vinyl lettering prior to installation- just to make sure you measured correctly.
Clean Your Surface
Regardless of how you plan to install your Vinyl Letters for Boats, you’ll want to clean the area you’ll be installing the vinyl with a gentle cleaning solution. If you’re forced to use a heavier cleaner, simply wash the surface afterwards to ensure any chemicals are removed.
Method 1: Standard Installation (Experienced)
Installing Vinyl Lettering on Boats using the standard installation can easily be achieved with smaller lettering. If you’re installing anything typically over a foot you may wish to use the Hinge Method which follows. To begin the standard installation, without removing anything from the vinyl, tape the top of your vinyl letters to the surface of your boat. Place the letters exactly where you intend for them to be placed. Now would be a great time to take a step back and ensure the letters are level with your boat and overall are how you’d like them placed. Keep in mind that the boat itself may not be level, or the water level may change when the boat is afloat (if it’s not already).
Now we’ll be applying the vinyl. If you’d like to be able to move the vinyl around if you’re not sure about placement, now would be a great time to apply application fluid to the surface of your boat the vinyl will be applied to. Otherwise, you can continue with the installation. Keeping the vinyl taped to your boat, remove the sticky backing from the vinyl. This exposes the very sticky vinyl which you will now apply to your surface. We encourage you to start from the center of the vinyl and press outwards. After the vinyl has been applied, come back with squeegee and press against the vinyl to make sure no bubbles remain. In most cases you should be able to remove the masking tape fairly soon afterwards. However, if you used an application fluid first- you may need to wait a few minutes before removing the masking.
Method 2: Hinge Method Installation (Easy)
The second method is arguably easier, especially for larger installations where you may not have a second pair of hands to help you install a larger set of vinyl letters. To begin, you’ll start just like the standard installation method and tape your letters to your surface exactly where you intend to place them. (without removing any of the vinyl backing) Place the letters exactly where you intend for them to be placed. Now would be a great time to take a step back and ensure the letters are level with your boat and overall are how you’d like them placed. Keep in mind that the boat itself may not be level, or the water level may change when the boat is afloat (if it’s not already). For the hinge method, make sure your letters are taped to your surface as follows with tape holding your letters on each half.
Why you may ask? Well, we’ll be applying this decal in two parts. Now you’ll want to flip the vinyl lettering up and spray down the surface with an application fluid. This will make it easier to readjust the vinyl in the event you need to move it (you’ll want to do this for larger vinyl especially) First, remove the tape from the first half and pull back the vinyl backing on HALF of the vinyl lettering. You can either fold the necessary backing or tear it off. Now you can apply your first half of your vinyl. Be sure to press from the center of the whole vinyl lettering outwards towards the edges. This will push any air bubbles to the edges of your vinyl instead of trapping any inside.
Now with your first half applied you may wish to wait a few moments to make sure it has adhered before working the second half of your vinyl lettering. Once the first half is secured, repeat the steps for the second half. With the vinyl applied, you’re all done! Great job.


